Patients
The Patients page is your clinic's directory where you look up, add, edit, message-review, and remove patient records.
Auto-generated from the in-app Help for /patients — source of truth src/lib/help-content/.
Find a patient
Search and browse the patient directory.
- Click into the Filter by name... box above the table.
- Start typing any part of the patient's name; the table narrows as you type.
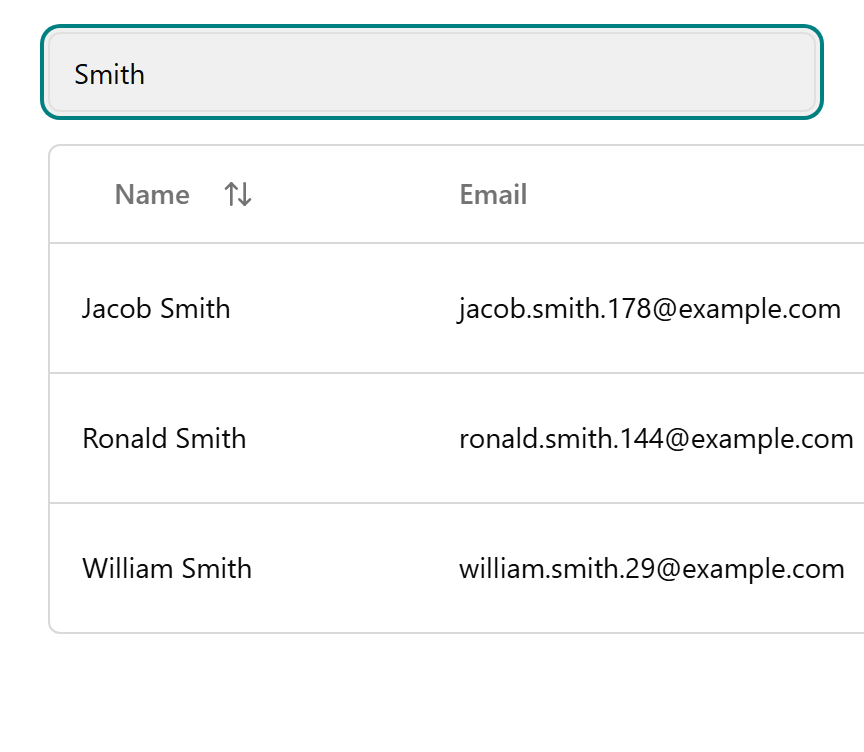
- To clear the filter, delete the text in the box to bring back the full list.
- Click the Name column header (with the up/down arrow) to sort A–Z, and click again to flip to Z–A.
- Use Previous and Next at the bottom-right to page through the list.
💡 Tip: Only the Name column is searchable — the filter does not match email or phone.
Add a new patient
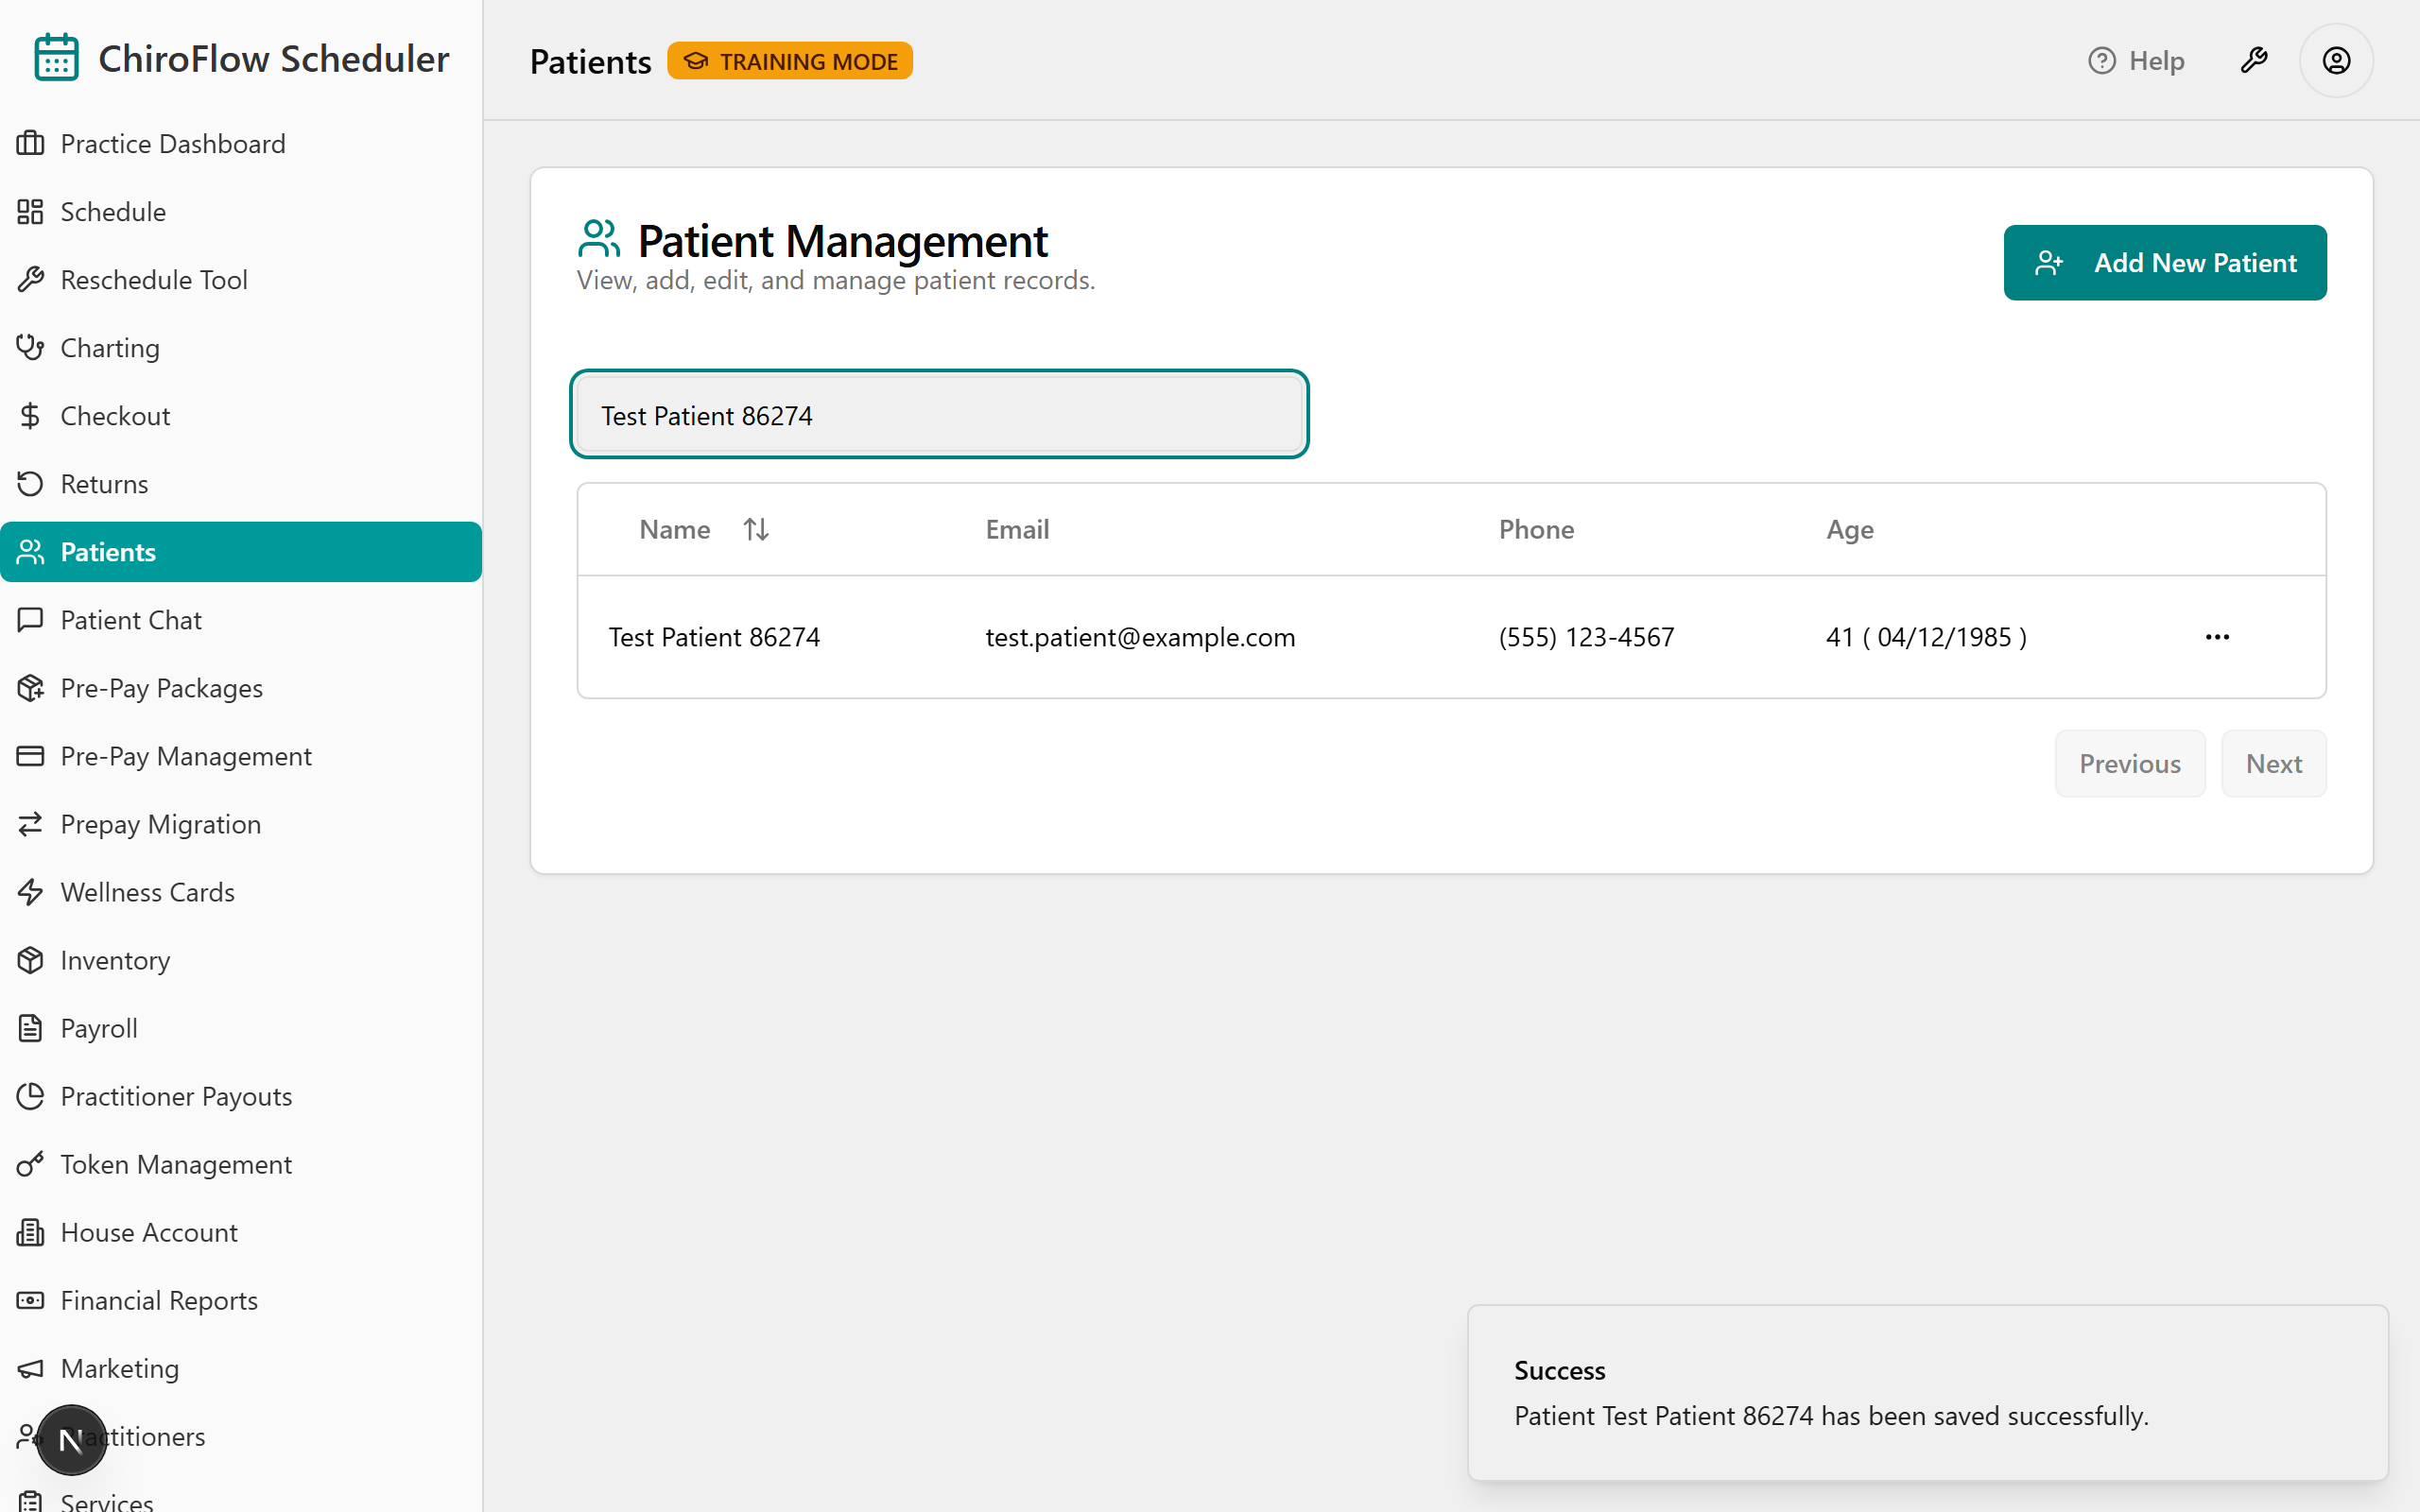
- Click Add New Patient in the top-right of the header to open the Add New Patient dialog.
- Enter the Legal Name (required, at least 2 characters).
- Optionally fill in Schedule Name, Email, Phone Number, Date of Birth (the MM, DD, YYYY boxes), Address, Notes, and Schedule Notes (Staff Only).
- Click Save Patient.
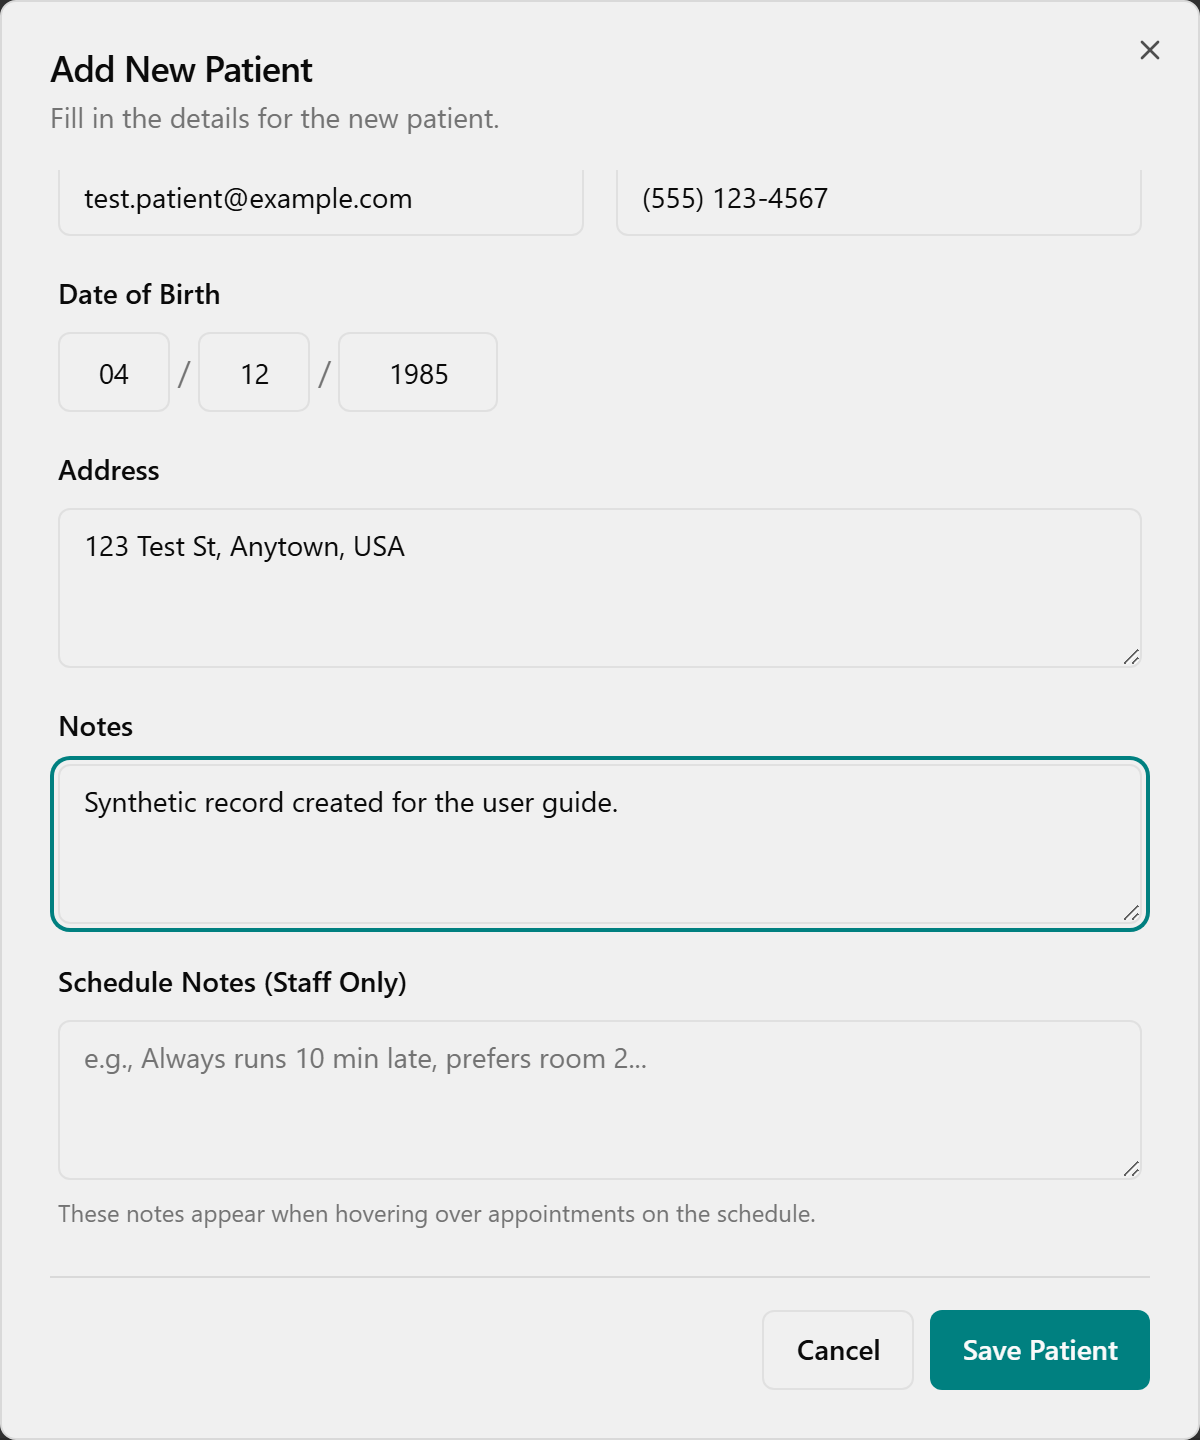
- A toast confirms "Patient [name] has been saved successfully." and the new patient appears in the list.
💡 Tip: If you enter an Email it must be valid, or you'll see "Invalid email address." Leaving it blank is allowed. Click Cancel to back out without saving.
Edit a patient's details
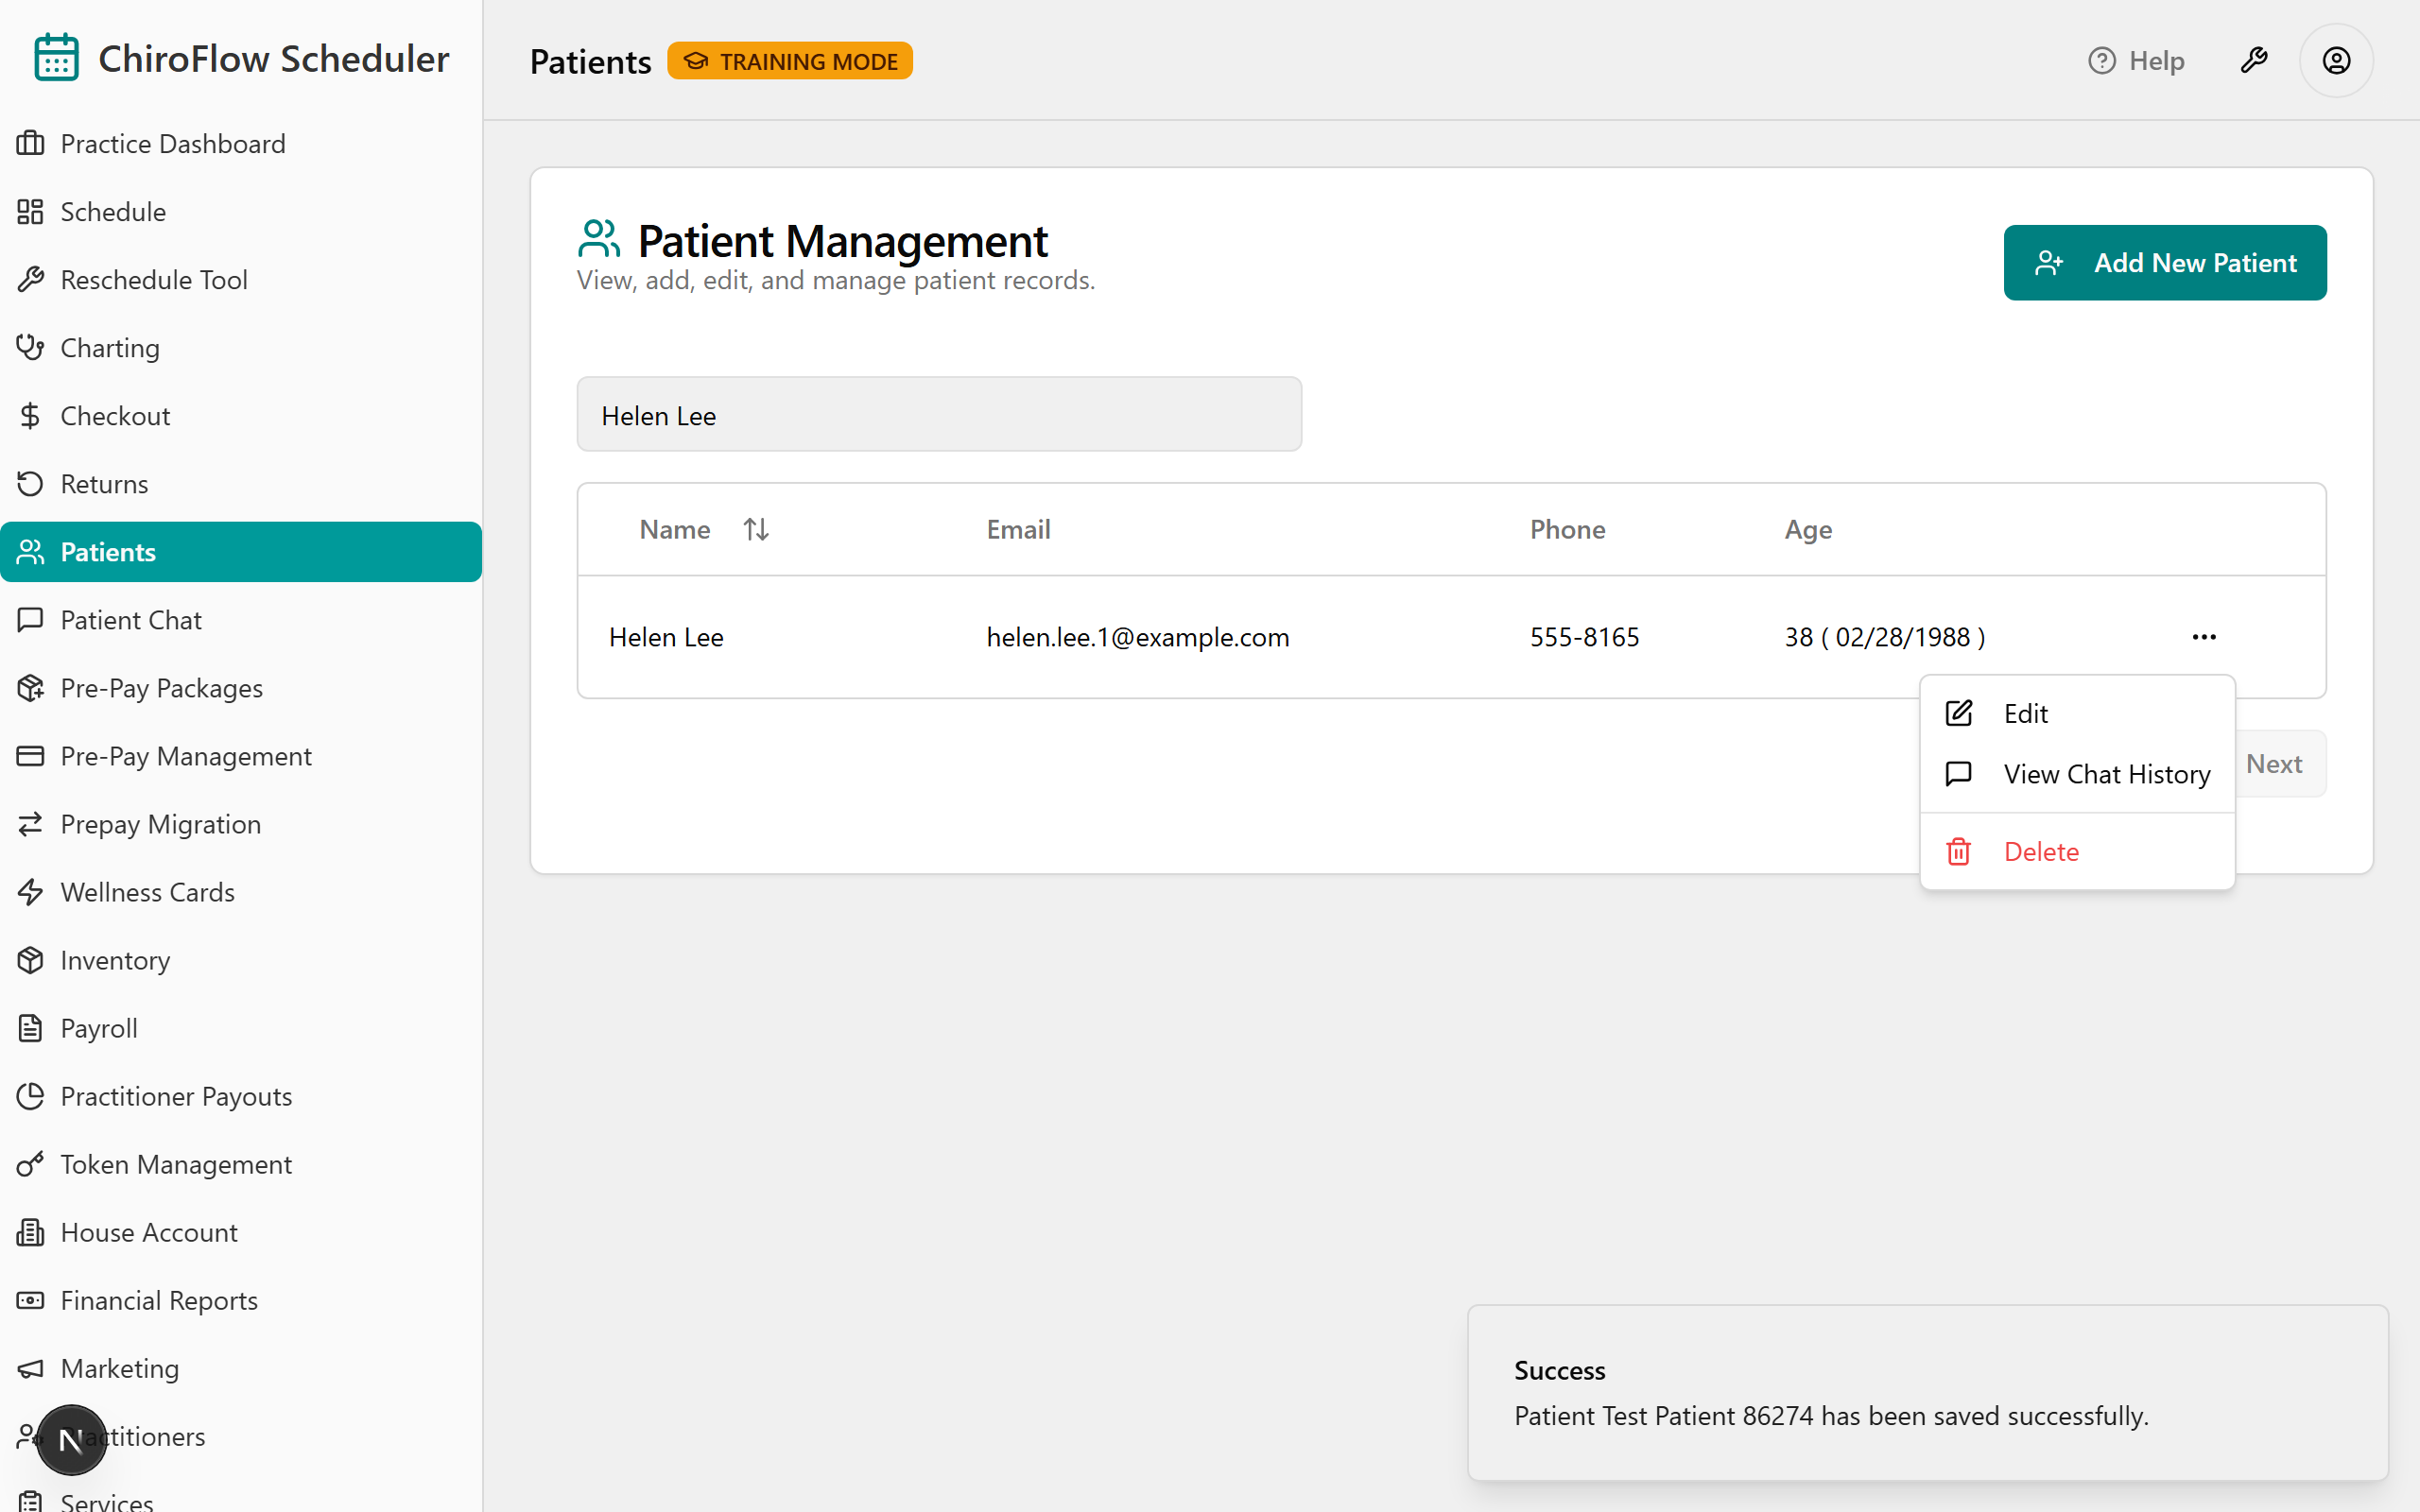
- Find the patient's row and click the three-dots (⋯) actions button at the end of it.
- Click Edit (pencil icon) to open the Edit Patient dialog, pre-filled with their current details.
- Change any field, such as Legal Name, Phone Number, Email, or Notes.
- Click Save Patient; a "[name] has been saved successfully." toast confirms the update.
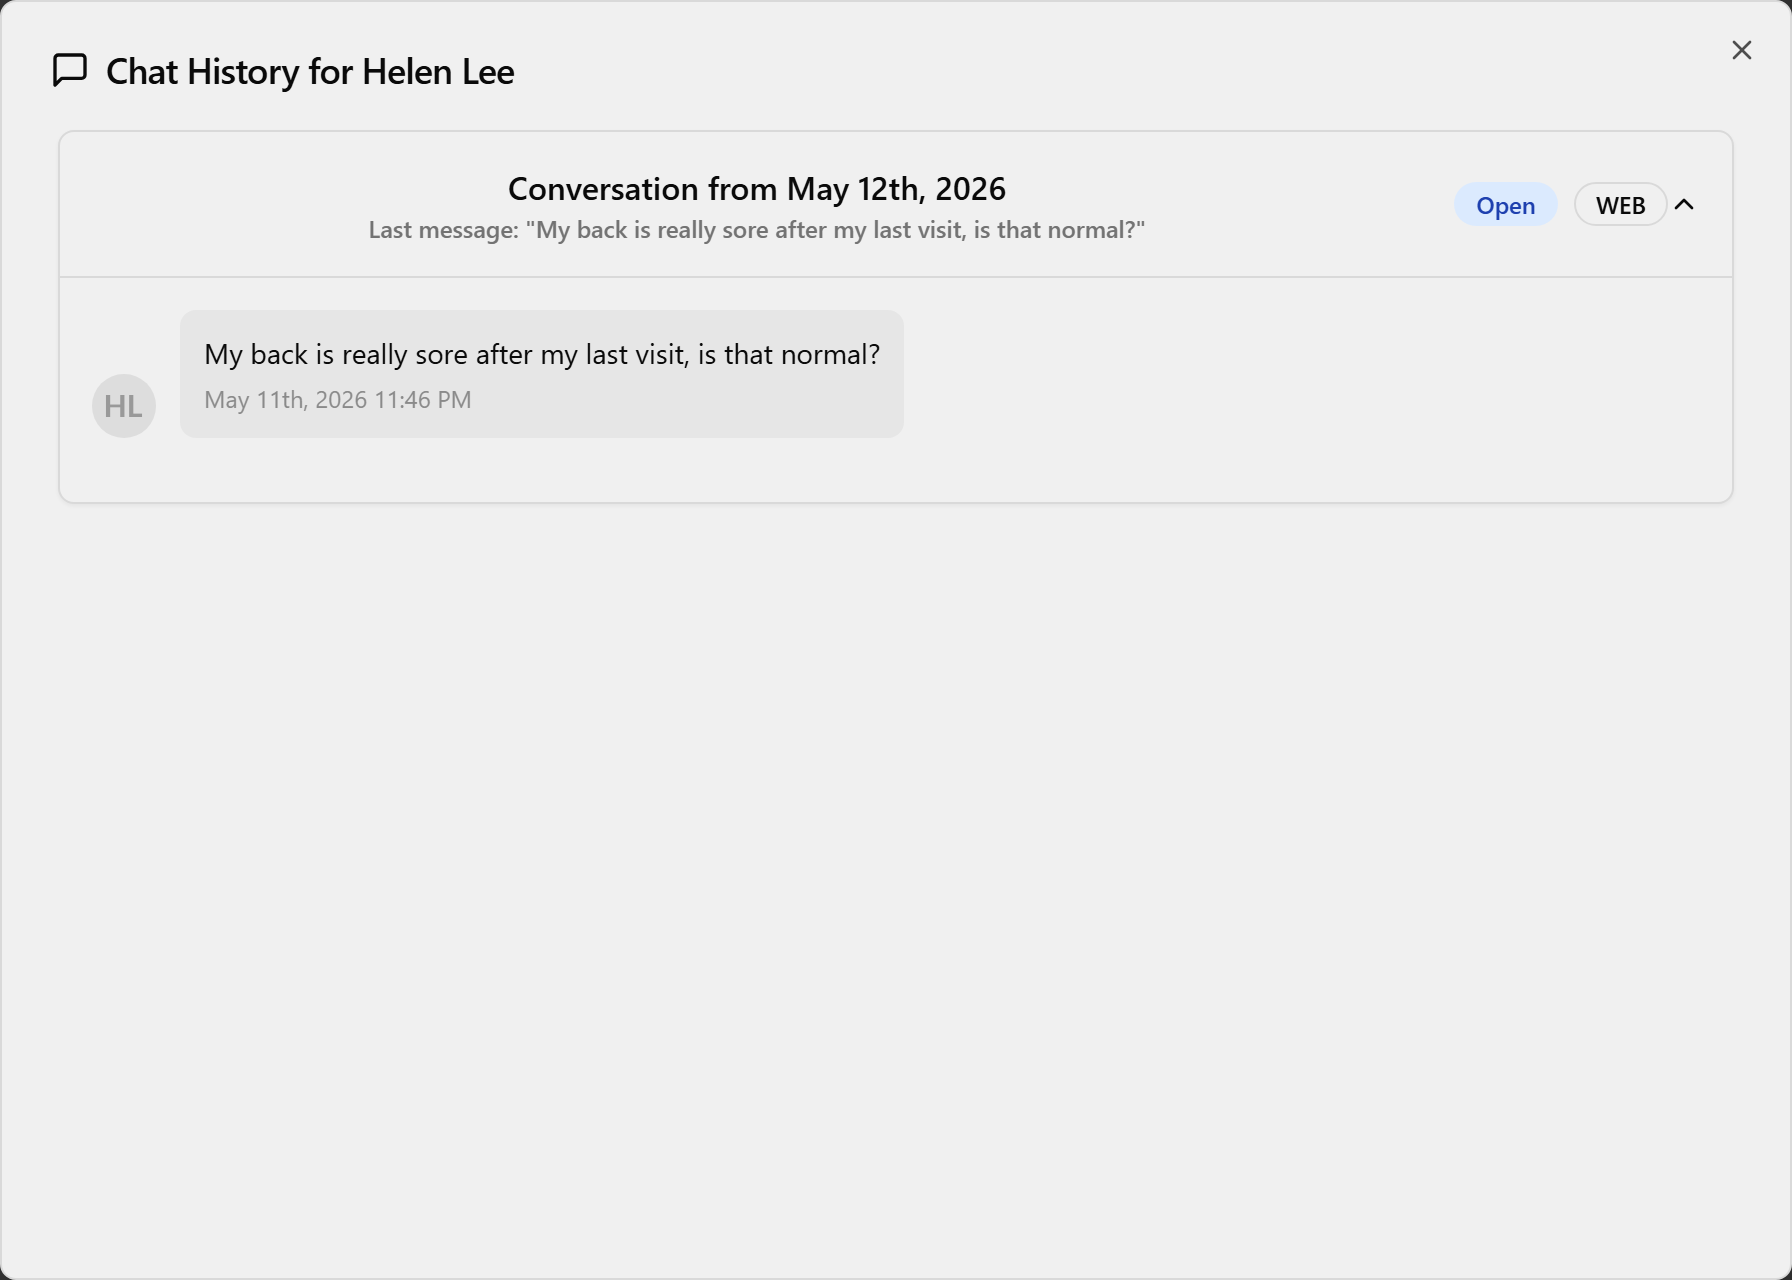
View a patient's chat history
Review past conversations the patient had with the clinic.
- Click the three-dots (⋯) actions button at the end of the patient's row.
- Click View Chat History (speech-bubble icon) to open the Chat History for [patient name] dialog.
- Click any conversation panel to expand it and read the full thread, with status and channel badges and timestamps.
- Close the dialog (click outside it or the X) when you're done.
💡 Tip: If the patient has never messaged, you'll see No Chat History Found. This page only shows chat history — appointments and pre-pay activity live on their own pages.
Delete a patient
- Click the three-dots (⋯) actions button at the end of the patient's row.
- Click Delete (red trash icon).
- In the Are you absolutely sure? dialog, click Continue to delete or Cancel to keep the patient.
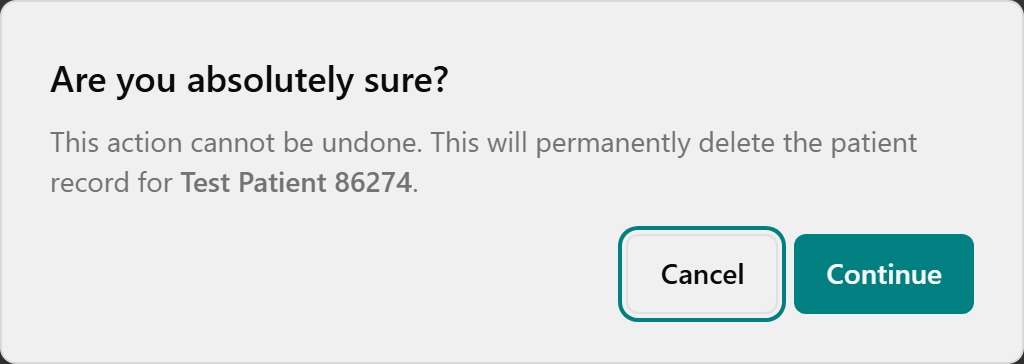
- A toast reads "[name] has been removed from the system." and the row disappears from the list.
💡 Tip: Deleting is permanent — there is no undo, so use the confirmation step as your safety check.