Pre-Pay Management
Sell pre-paid packages to patients and track their balances, authorized users, and usage history.
Auto-generated from the in-app Help for /prepay-management — source of truth src/lib/help-content/.
Sell a pre-pay package to a patient
Create a new pre-pay purchase for a patient.
- Click New Purchase in the top-right of the page.
- In the Purchase Pre-Pay Package dialog, optionally use the Filter by Category dropdown to narrow the package list.
- Under Select Package, click the package card you want — the selected card gets a highlighted border.
- Open the Purchaser (Patient) dropdown and choose the patient who is paying (they are added to the authorized list automatically).
- Leave Expiration Period as-is — it is greyed out because the package sets it.
- Optionally, under Authorized Users, type in the Search patients to add... box and click a person to let them use the package too.
- Click Complete Purchase.
💡 Tip: Complete Purchase stays disabled until you've picked a package, a purchaser, and at least one authorized user. Pre-pay packages are non-refundable.
Find and view a patient's packages
Look up a patient and read their package details.
- Type part of the patient's name in the Search patient... box.
- Click the patient's row to expand it.
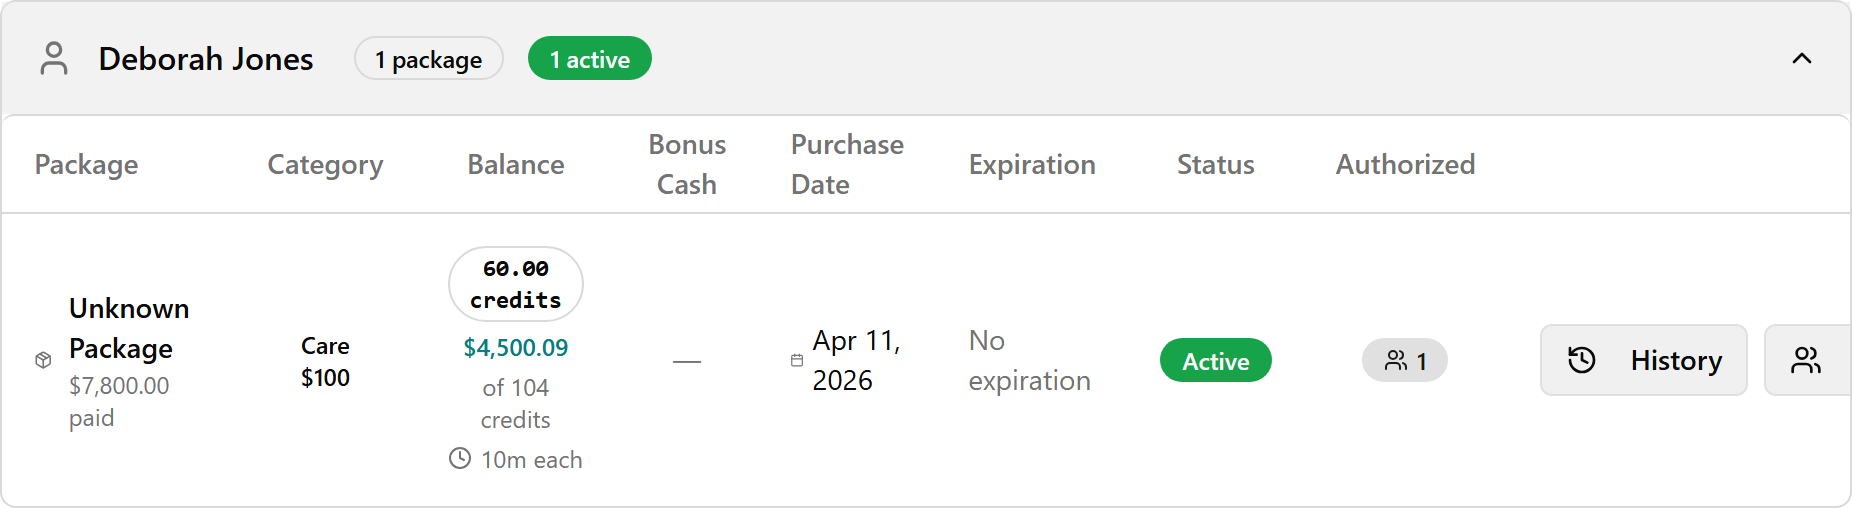
- Read the Balance column to see how much is left; hover it to see how much has been used.
- Optionally hover the badge in the Authorized column to see everyone allowed to use the package.
💡 Tip: Packages are grouped under the purchaser (sorted by first name), even when shared with other patients.
Filter the package list
Narrow the list by category, status, or purchase date.
- Pick a service type from the Category dropdown to show only that category.
- Pick Active, Depleted, or Expired from the Status dropdown to filter by state.
- Click the Purchase date range button, then click a start and end date on the calendar to limit by purchase date.
- Watch the X of Y packages count on the right update as you filter.
- Click Clear filters to reset everything at once.
💡 Tip: Status colors: Active (green) is usable, Depleted (grey) is used up, Expired (red) is past its date.
Show or hide used-up packages
- Find the Hide depleted toggle in the top-right header.
- Click the toggle off to show fully-used packages (the icon changes to an open eye).
- Click it again to hide them.
💡 Tip: Hide depleted is on by default; the number in parentheses, e.g. "Hide depleted (3)", shows how many are hidden.
View a package's usage history
See every time a package's balance was used.
- Expand the patient's row.
- On the package you want, click the History button in the Actions column.
- Read the Usage History panel that slides in from the right — review the Purchaser, Amount Paid, Current Balance, and Purchased summary cards.
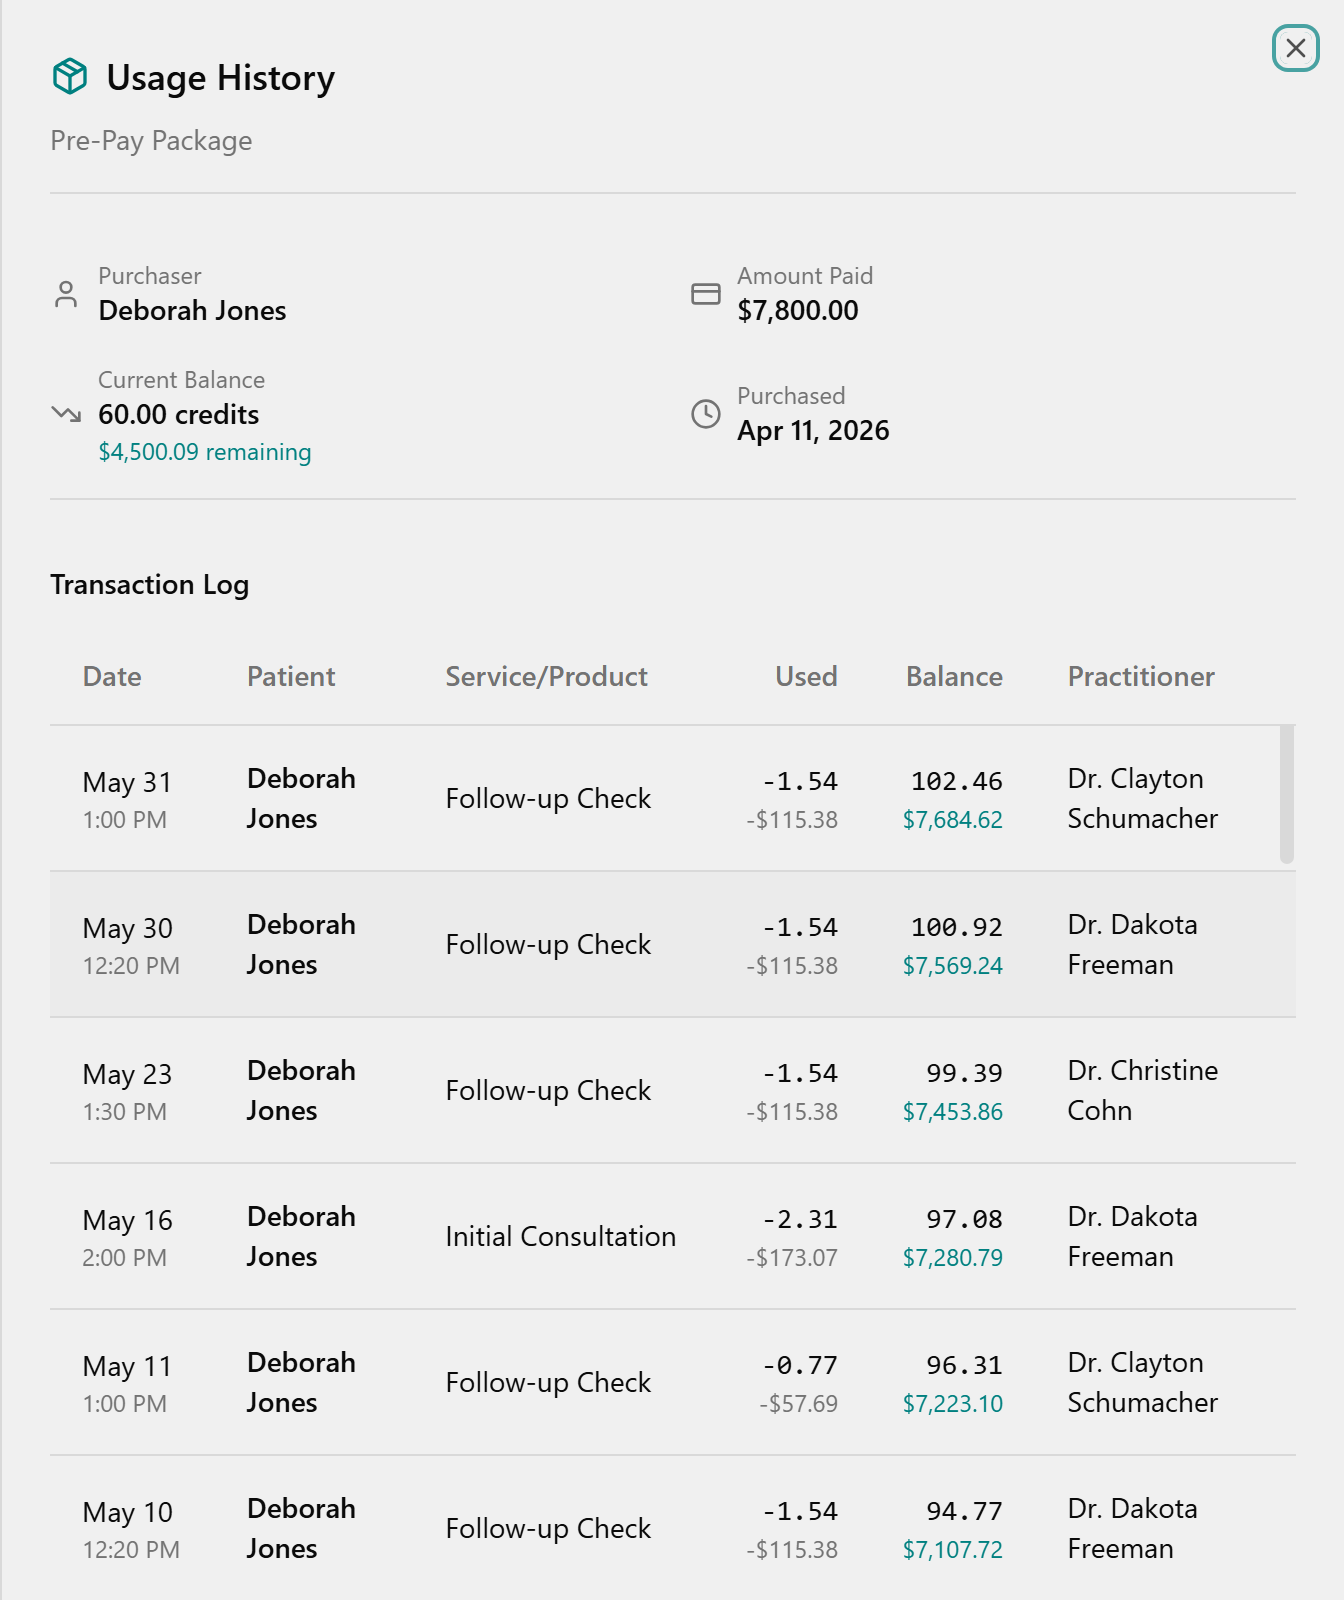
- Under Transaction Log, review each use's Date, Patient, Service/Product, Used, Balance, and Practitioner.
- Close the panel when done (click outside it or the close control).
💡 Tip: Product returns appear in green with a plus sign and a "Product Return:" label. If unused, you'll see "No transactions found."
Manage who can use a package
Add or remove authorized users on an existing package.
- Expand the patient's row, then click Manage Users on the package.
- In the Manage Authorized Users dialog, review Currently Authorized Patients.
- To remove someone, click the "X" next to their name (the purchaser can't be removed).
- To add someone, type in the Search patients to add... box and click them in the results — they get a green New badge.
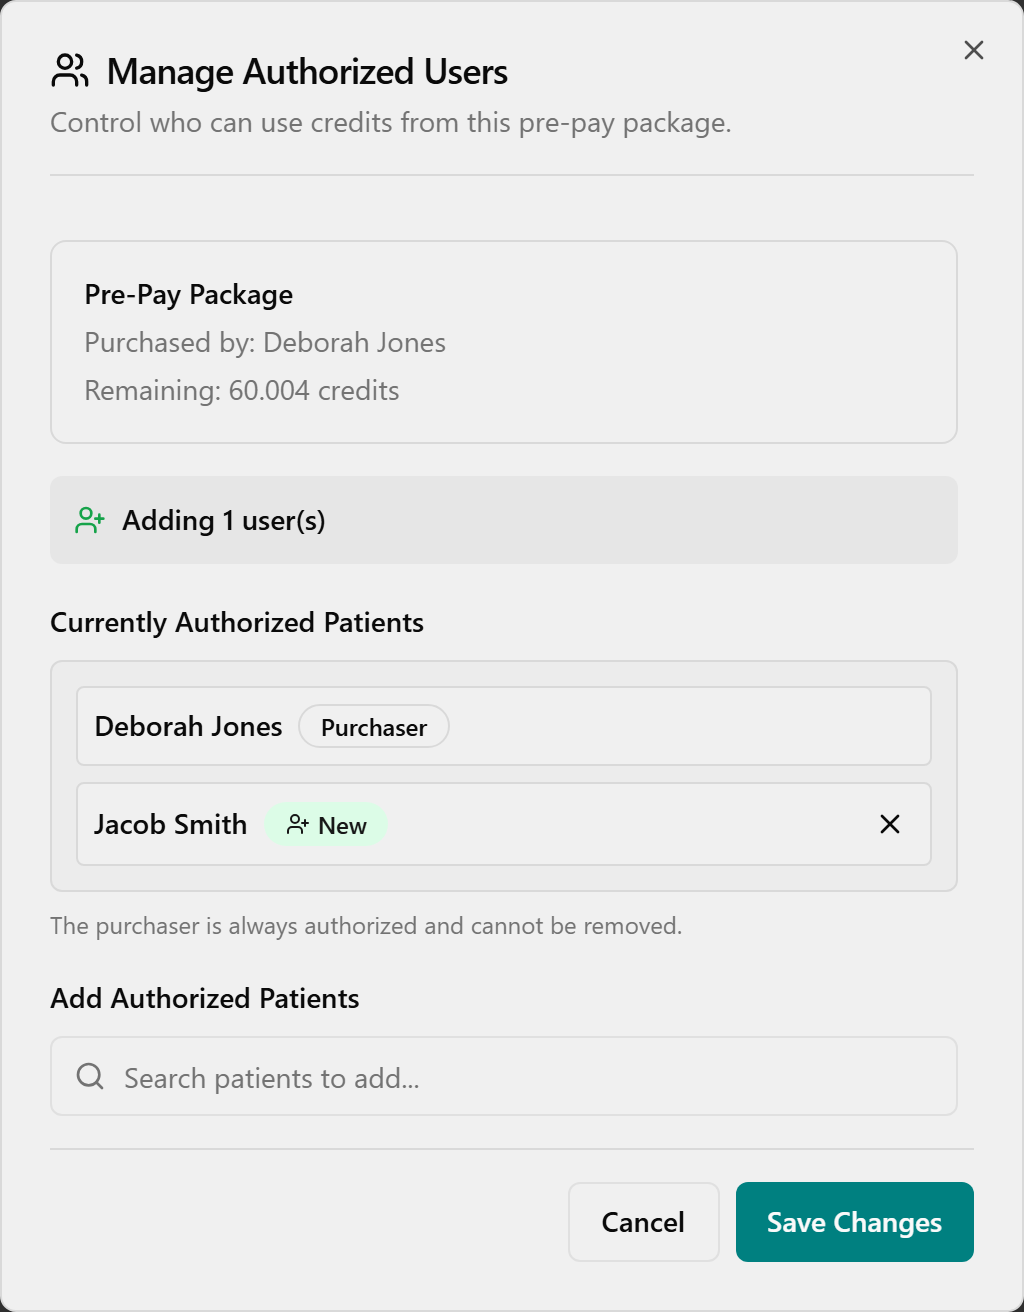
- Click Save Changes to apply, or Cancel to discard.
💡 Tip: The purchaser always has a Purchaser badge and cannot be removed. Save Changes is disabled if no one is left in the list.
Use a patient's pre-pay balance
Redeeming a package happens at Checkout, not on this page.
- Go to Checkout (or check the patient out from the Schedule) for an authorized patient's appointment.
- Find the Use Pre-Pay Credits panel, which lists each eligible package with its balance.
- Choose a package option instead of "Pay with regular payment methods" to apply its balance.
- Complete the checkout — the deduction then appears in the package's Usage History and lowers its Balance.
💡 Tip: If the patient has no eligible package, the panel reads "No eligible pre-pay packages found for this practitioner."