Staff Schedule
View and manage the daily timeline of shifts for your non-practitioner staff — pick a day, mark attendance changes like late arrivals or sick days, and generate a fresh schedule.
Auto-generated from the in-app Help for /staff-schedule — source of truth src/lib/help-content/.
Move to a different day
Change which day's shifts the timeline shows.
- Click the left-arrow button to step one day back.
- Click the right-arrow button to step one day forward.
- To jump to any date, click the middle button showing the current date, then pick a day in the calendar that pops up.
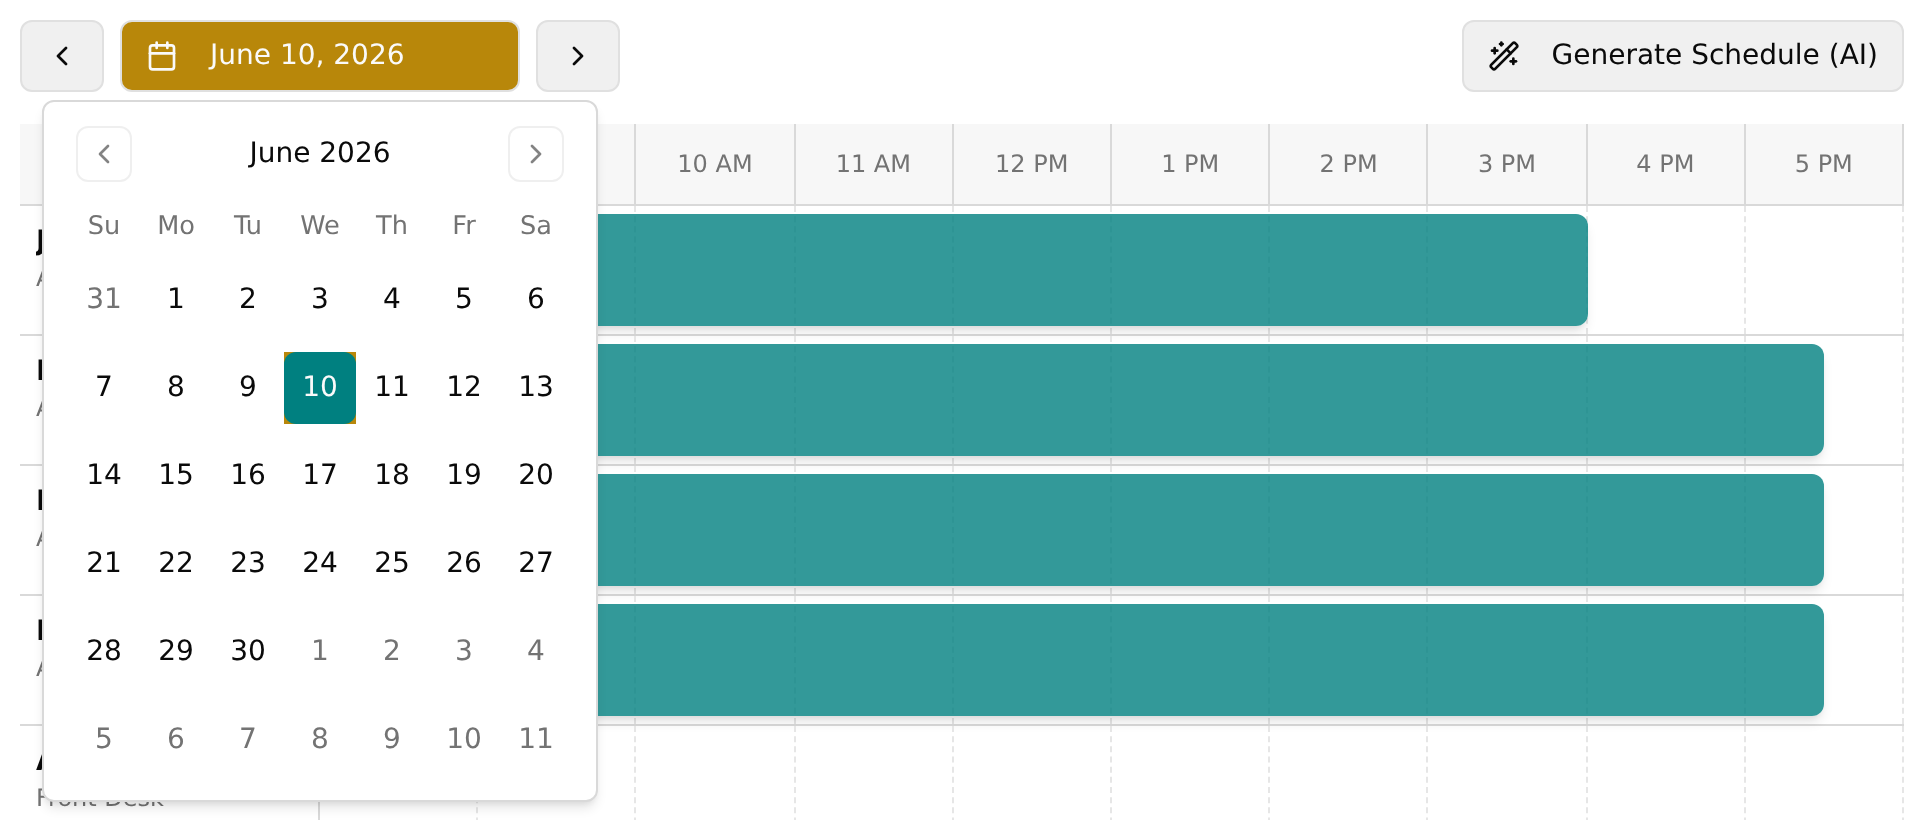
- The grid reloads automatically for the day you chose.
Generate the staff schedule
Build shifts when the timeline is empty or you want a fresh schedule.
- Click Generate Schedule (AI) in the top-right of the toolbar.
- Wait while a Generating Schedule... toast appears and the button shows a spinning loader; it is building an optimized schedule for the next two months.
- Wait for the Schedule Generated! success toast.
💡 Tip: Re-running this replaces existing shifts within the next two months with a fresh set; days before today are left unchanged.
Quickly mark a shift status
Use this for statuses that don't need a specific time: Scheduled, Called Out Sick, No Show, and PTO / Vacation.
- Click the staff member's shift tile to open its menu.
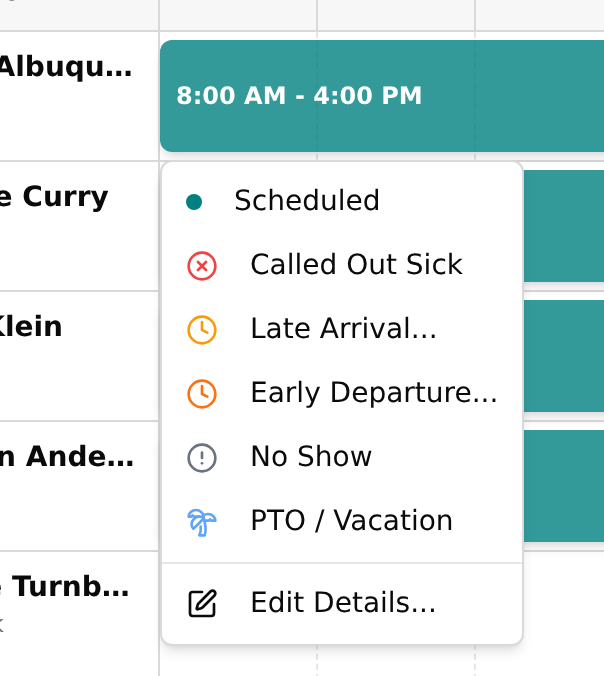
- Click the status you want, for example Called Out Sick or PTO / Vacation.
- A Status Updated toast confirms the change, and the tile changes color and icon to match.
Record a late arrival
- Click the shift tile, then choose Late Arrival... from the menu.
- In the Edit Shift dialog, enter the time the person actually arrived in Actual Start Time.
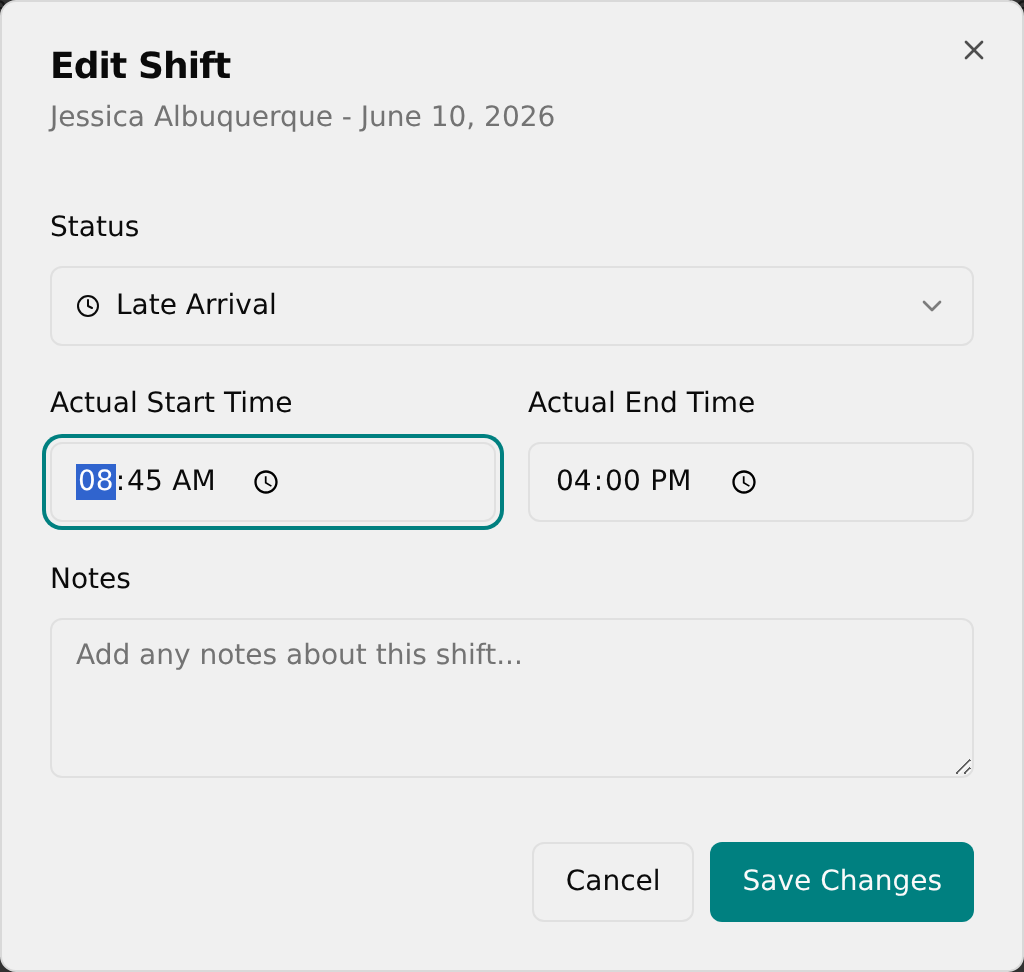
- Optionally adjust Actual End Time and add Notes.
- Click Save Changes and confirm the Shift Updated toast.
💡 Tip: If you set both a later start and an earlier end, the status automatically switches to Late Arrival + Early Departure when you save.
Record an early departure
- Click the shift tile, then choose Early Departure... from the menu.
- In the Edit Shift dialog, enter the time the person actually left in Actual End Time.
- Optionally add Notes.
- Click Save Changes and confirm the Shift Updated toast.
Edit any shift's details
Set any status, real times, and notes from one dialog.
- Click the shift tile, then choose Edit Details... at the bottom of the menu.
- Use the Status dropdown to choose any status, from Scheduled through PTO / Vacation.
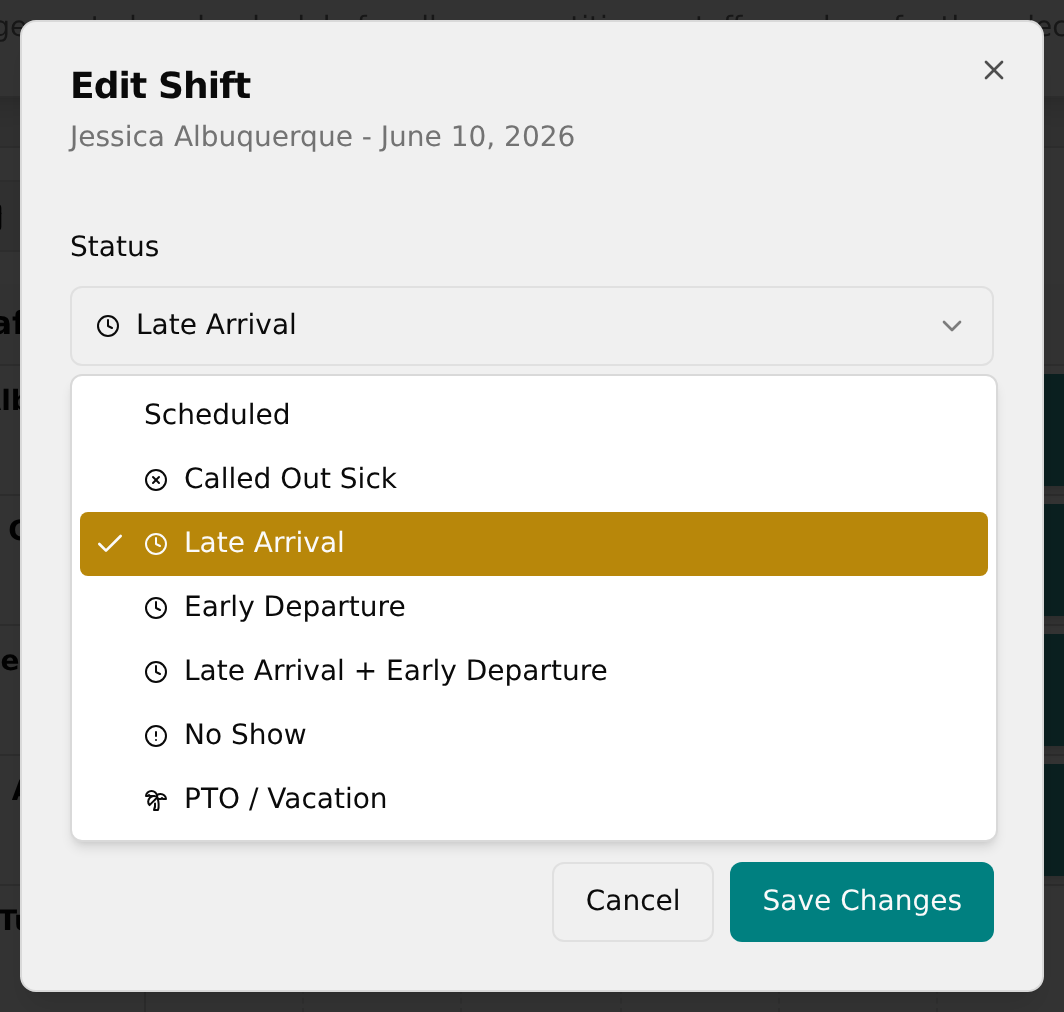
- For Late Arrival, Early Departure, or the combined status, set the Actual Start Time and Actual End Time fields that appear.
- Type any context in Notes, then click Save Changes — or Cancel to close without saving.
💡 Tip: This page is Admin-only. Shifts come from the generator, so there's no way to add a brand-new shift from scratch or delete one — you only edit existing shifts.